
Product prototyping with 3D printing: real examples from Bangladesh
Why to prototype before tooling, what form, fit and function prototypes test, and how tight printed fits can be, with eight projects from our Dhaka workshop.
Product prototyping in Bangladesh, in short: you send a 3D file or a sketch, we print a form, fit or function prototype in our Dhaka workshop, you test it, and you change the design before any mould is made. Typical turnaround is 2–5 working days from quote confirmation (per the FDM quote page, October 2026).
A mould or a production line is expensive to change once it exists. A 3D printed prototype is cheap to change. That gap is the whole case for product prototyping, and it is why people in Bangladesh bring us bottle shapes, fan housings, keyboard cases and mouse shells before tooling, or as one-off custom parts. This article explains what a prototype should test, how tight a printed fit can realistically be, and how to plan the rounds. It uses eight projects from our own workshop in Dhaka as examples. The customers are not named, because the posts don't name them.
Why prototype before tooling
For injection moulding, Protolabs says the main cost driver is the time it takes to make the tooling, and that more complex geometry costs more. The same guide notes that removing steel from a mould is fairly simple, while adding it back can be practically impossible. In other words, some design changes after tooling mean a new tool.
A printed prototype moves that discovery earlier. Stratasys describes printed prototypes as parts you can have in hours or days rather than weeks, then change, reprint and test again in short cycles. Protolabs describes the usual sequence the same way: prototype parts are made for form, fit and some function testing, and only later machined or moulded once quantities justify production tooling.
Form, fit and function: decide what this round must answer
The most useful habit in product prototyping is to name the question before you print. A single print rarely answers everything, and trying to make it do so usually wastes material and time.
- Form (looks-like). Size, shape, proportions and how it feels in the hand. Design 1st puts it as illustrating the overall size, shape and key user-experience points; it does not have to work.
- Fit. Whether parts assemble: halves that interlock, holes that line up with screws, a PCB that drops into its case.
- Function (works-like). Whether the assembled part does its job under real use: weight, stiffness, movement, heat from electronics.
Real examples from our workshop
These are projects we printed and posted on our Facebook page between April 2025 and August 2026. Where a post doesn't state the material, size or print settings, we leave them out here too.
A rechargeable fan, from parts to a working unit
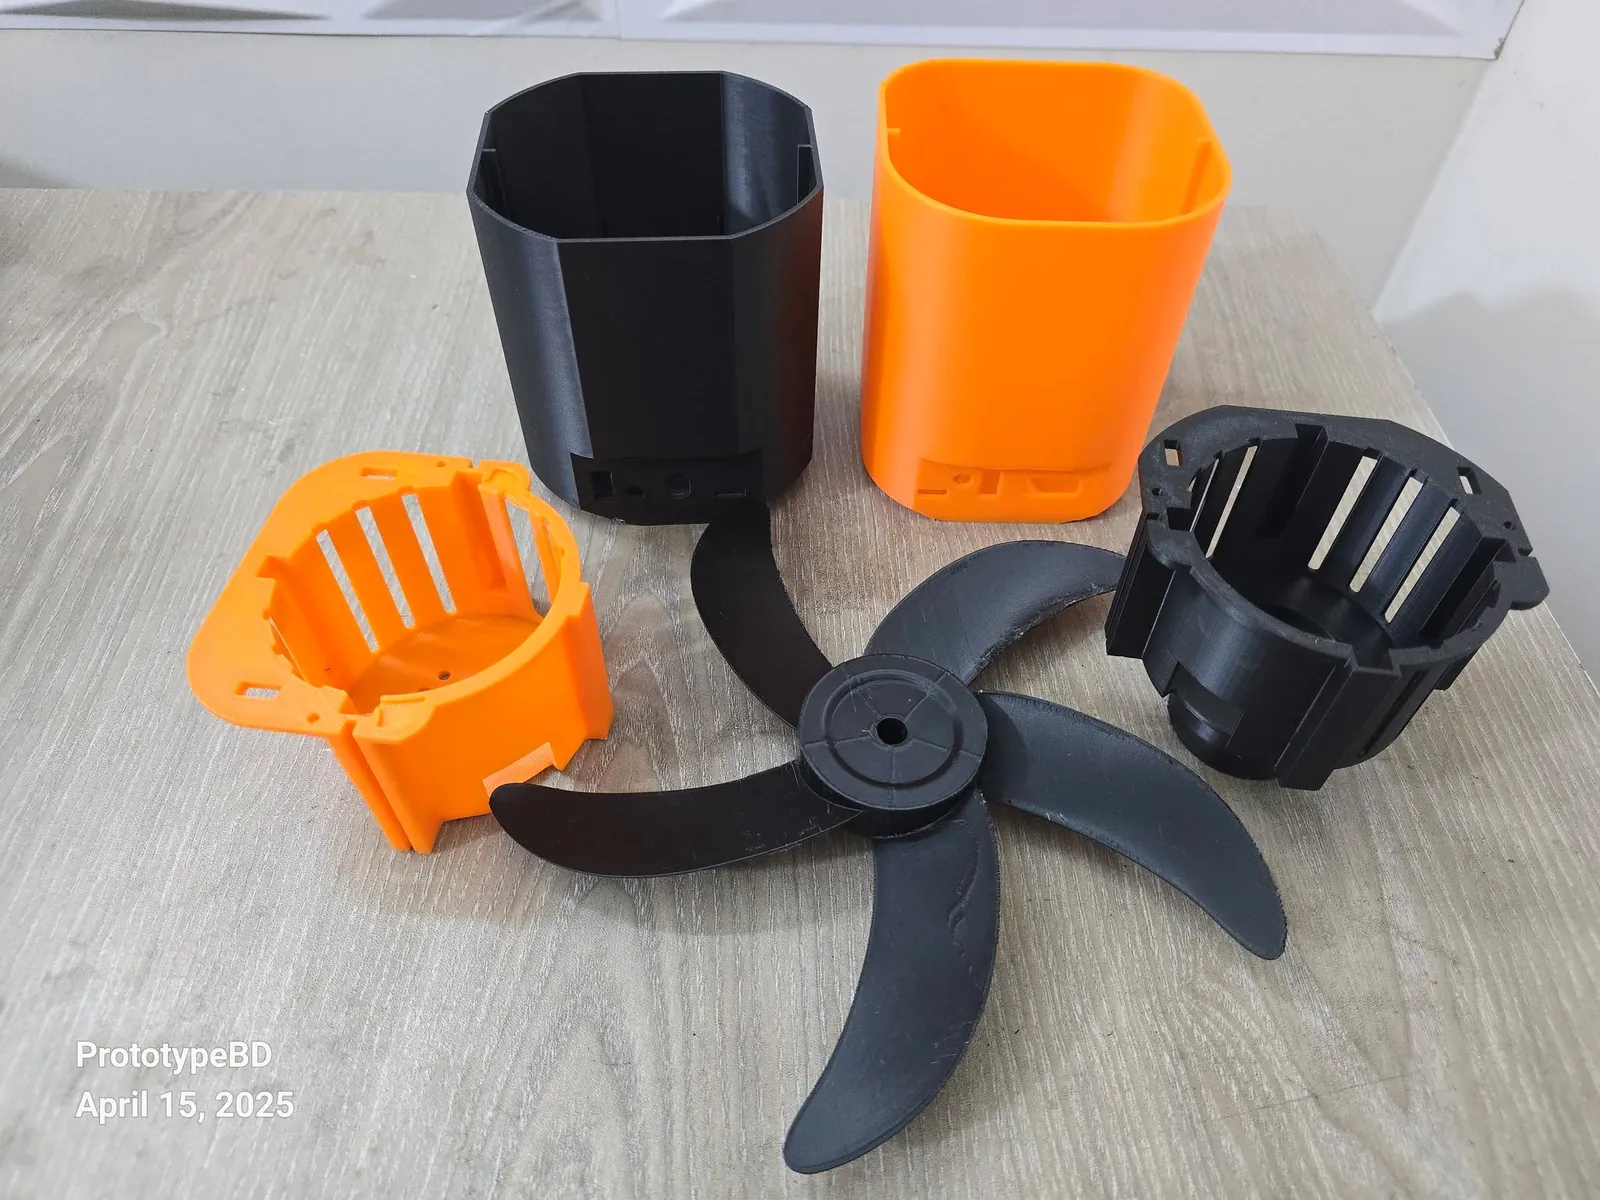
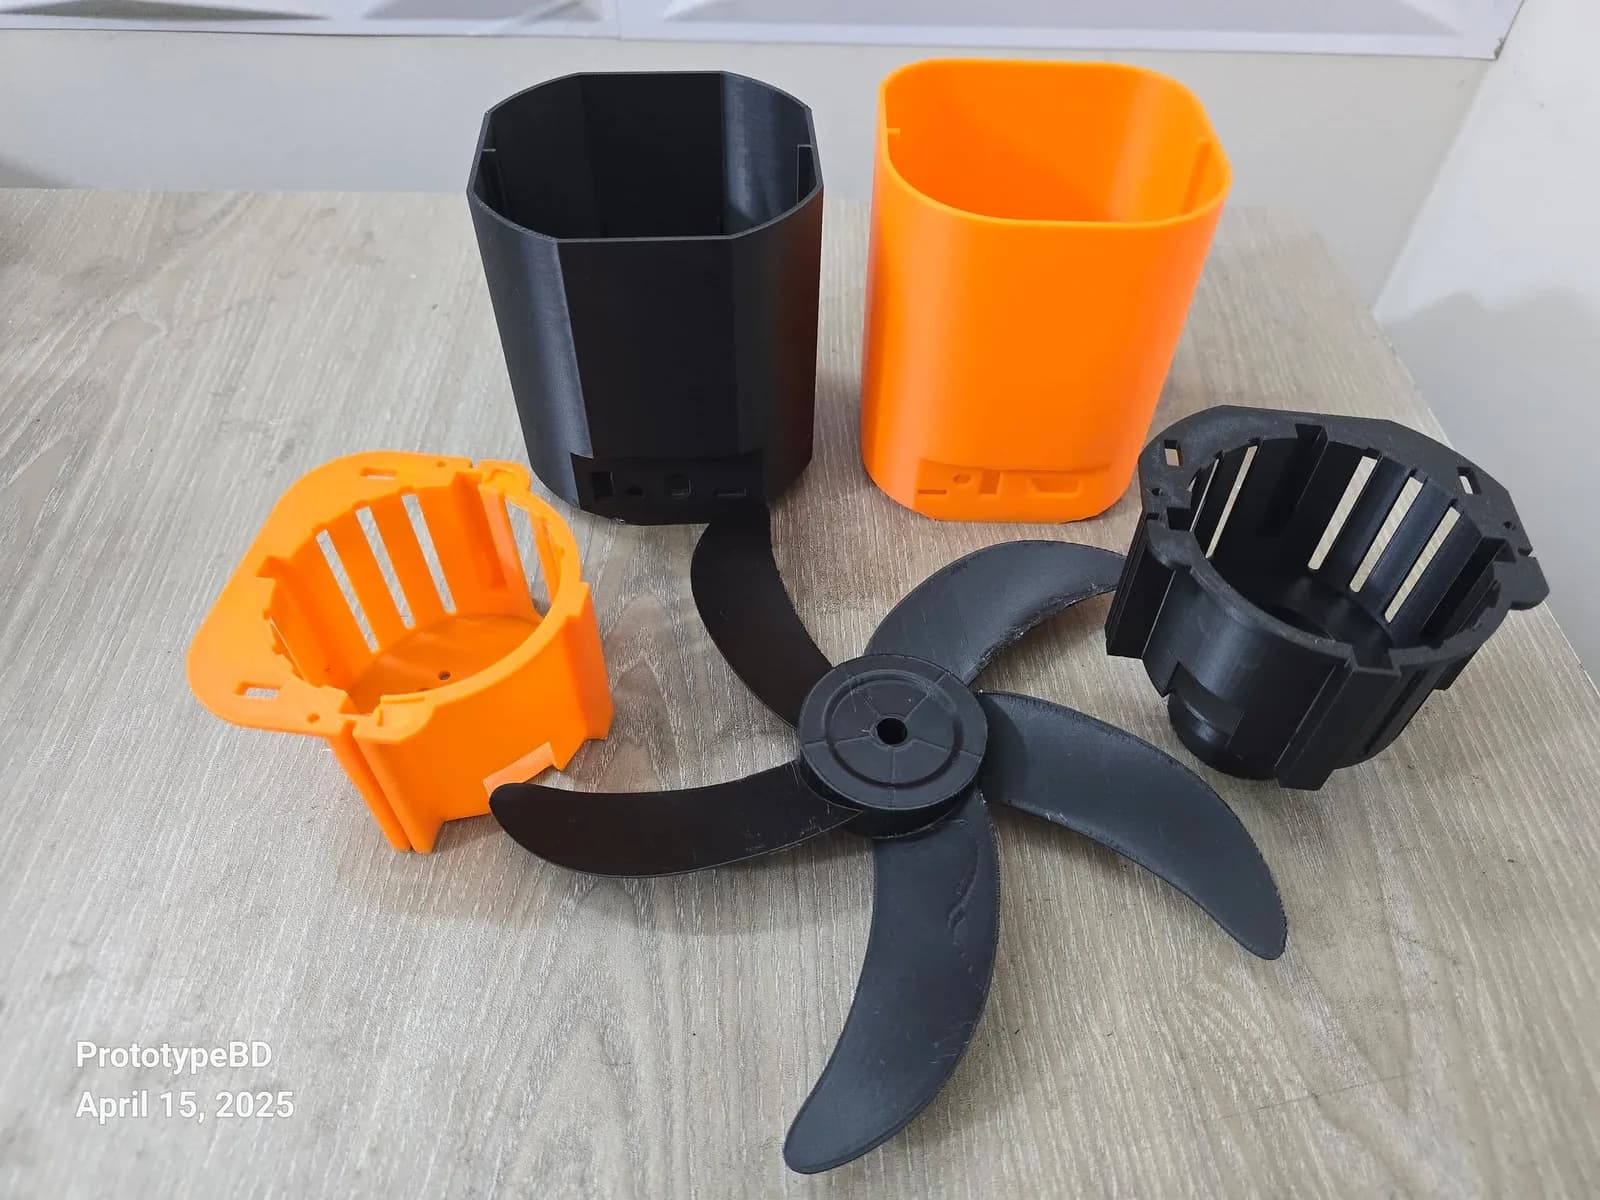
A customer asked for a rechargeable fan built to their own requirements. According to our post, every part was designed, 3D printed and assembled, and the finished fan was photographed standing with its blades and wire guard in place. This is a function prototype: the question is not only "does it look right" but "does the motor sit in its housing and does the blade turn freely".
One bottle shape in three sizes
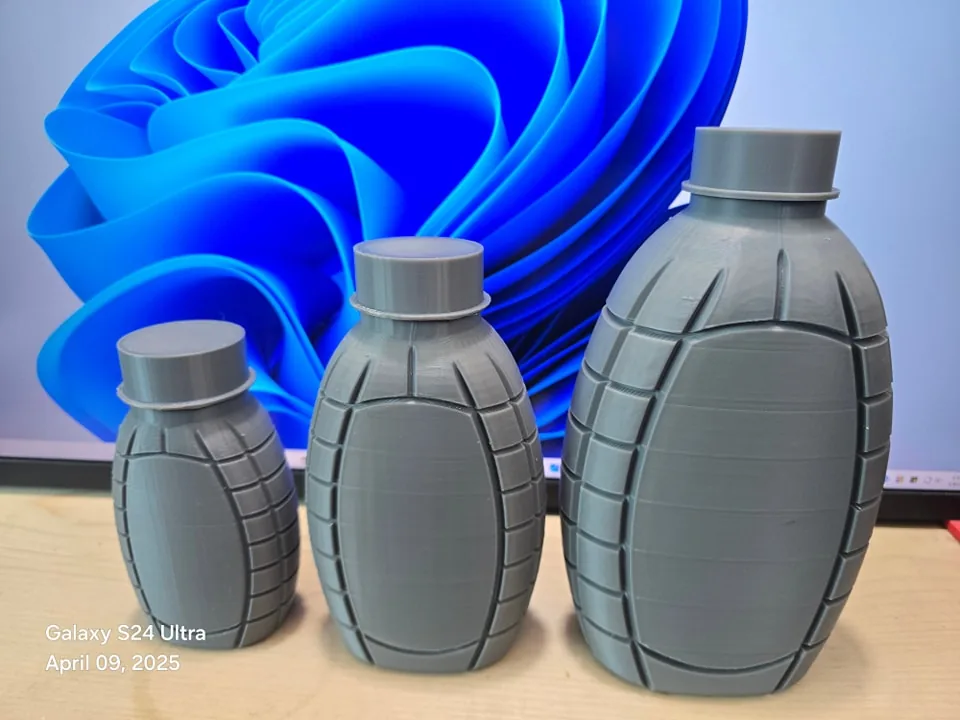
Packaging is a classic form prototype. Here one bottle design, with ribbed side panels and a round neck, was printed in three sizes, so the shapes can be held, compared side by side and shown to others before anyone commits to production. A screen render can't tell you how a bottle feels in the hand or how it stands next to its siblings on a shelf. A print can.
A later bottle project (August 2026) shows the next step. The post describes it as part of a validation process: checking design, size, fitting, function and overall look before going to market. In the video, the bottle was printed as two sections, a shoulder-and-neck piece and a ribbed body, on one of our printers.
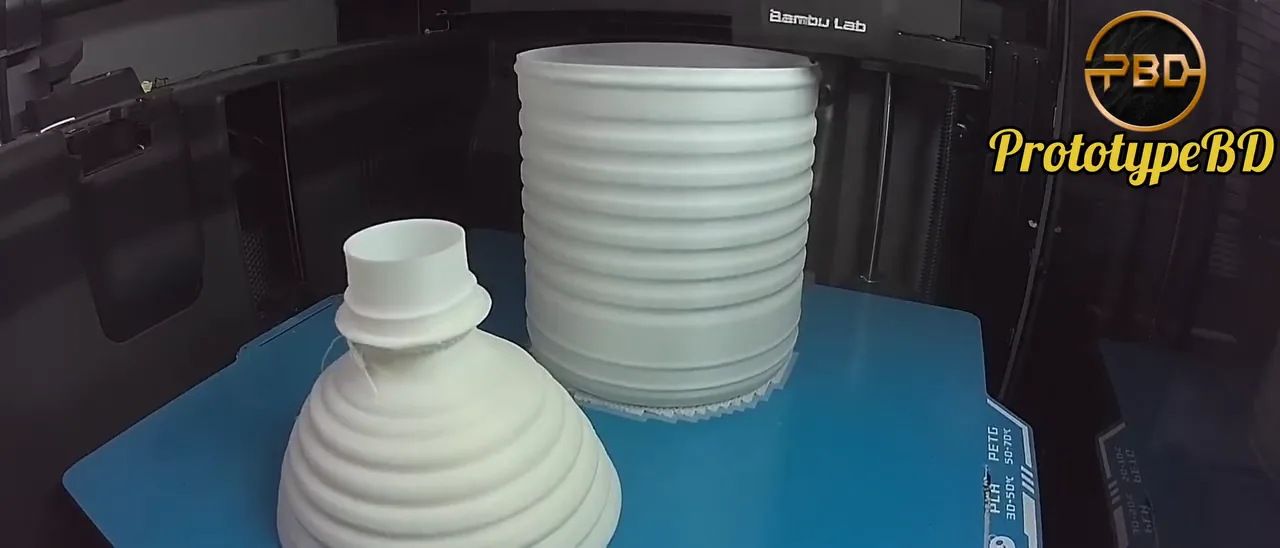
Splitting a tall part is often a practical choice: each section fits the printer and prints in a better orientation, and the joint itself becomes something you test.
A pot shape before moulding
In October 2025 we designed and printed a custom pot prototype, the kind of part that goes on to mass production by moulding. That is exactly the case Protolabs warns about: printed parts don't need draft, so it is easy to forget. Their guidance is that if a part will be moulded later, draft should be designed in from the start, with at least 0.5° on vertical faces advised, because adding it late can change the form and fit you already approved. The same guide adds that 1 to 2 degrees works very well in most situations.
A two-piece funnel with interlocking halves
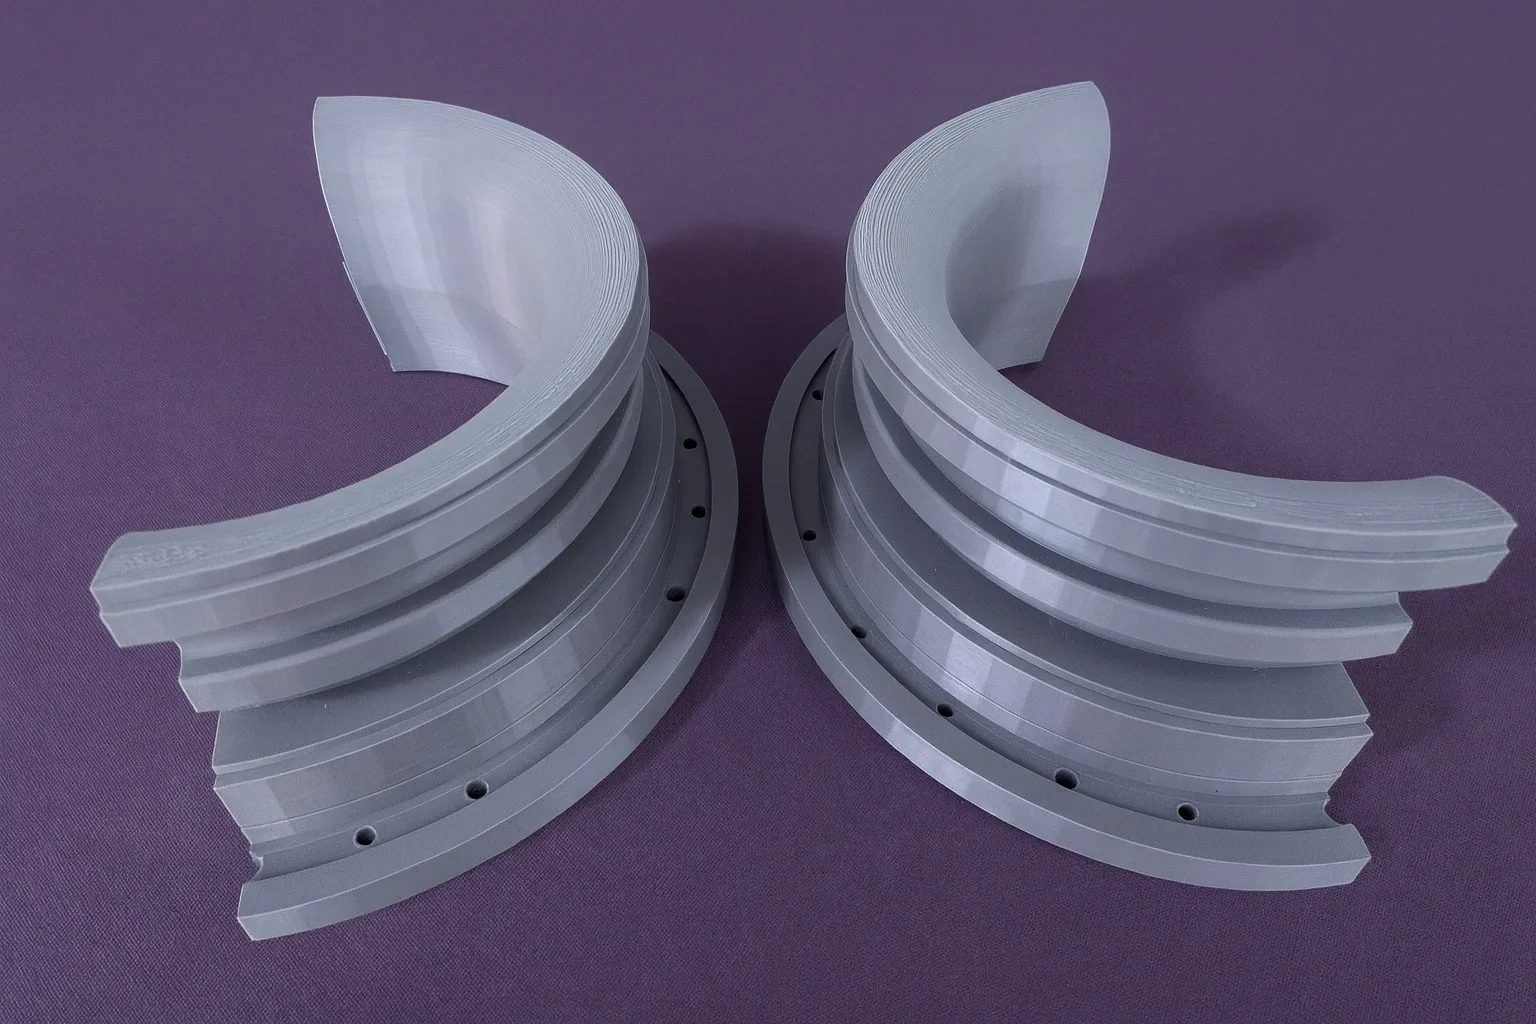
This part is a fit prototype. Its two halves interlock, and the flange carries a ring of mounting holes that must line up with whatever it bolts to. That is where printed tolerances matter, which we cover below.
A mouse shell near 40 grams
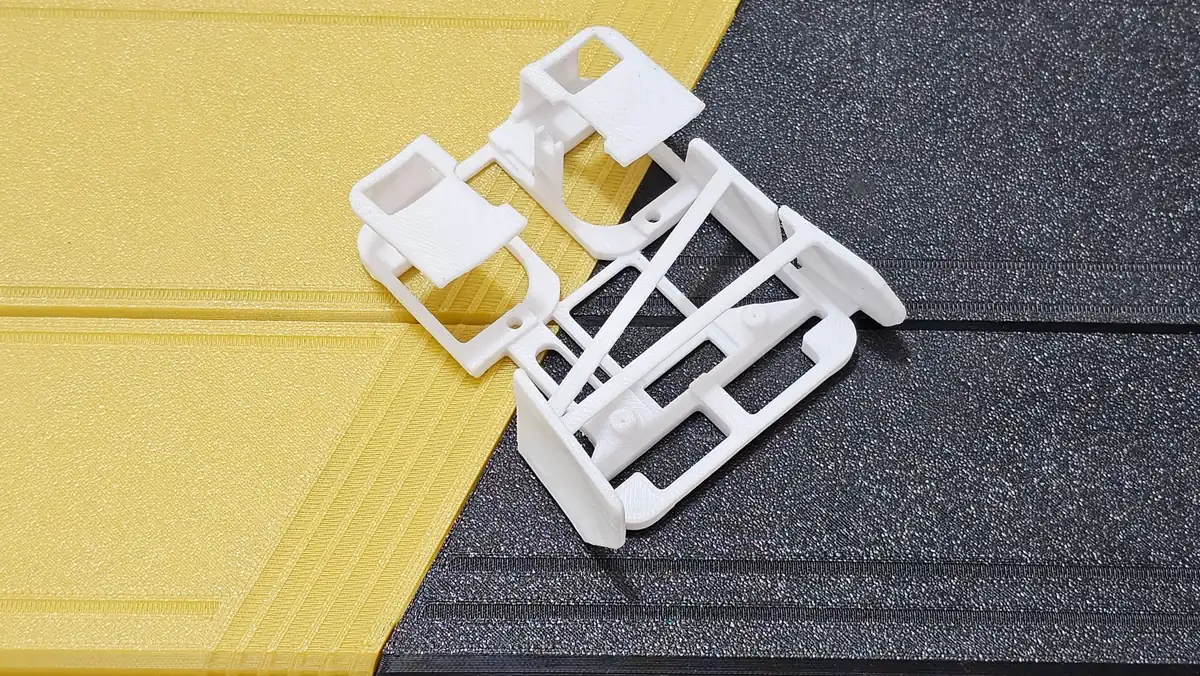
A customer sent an existing design and asked for a mouse case under 45 g without the battery. We adjusted the dimensions for fit, optimised the structure and printed a fully functional shell of around 40 g. Weight targets like this are function tests, and they are mostly won in the geometry: Prusa's documentation notes that a print's strength is mostly defined by the number of perimeters, not infill, so a light part needs well-placed walls and ribs rather than just less infill.
Electronics cases: a split keyboard and a sim-racing panel
Two more projects show the "does the electronics fit" question. One was a 3D printed case for what our post calls a Cygnus 2.4G split keyboard, with the switches and keycaps fitted into the two printed halves. Cygnus is a published, Dactyl-inspired split-keyboard design by Juha Kauppinen (Scytile), according to Keyboard Builders' Digest, and wireless 2.4G versions of it are shared by other makers; the post doesn't say which version's files were used. Credit: design, Cygnus (community design); 3D printing, PrototypeBD. The other was a sim-racing steering-wheel control panel with buttons, rotary knobs, paddles and an LED strip mounted on a printed plate. In both, the printed part has to hold real hardware in exact places. For more on that kind of job, see our guide to 3D printed enclosures for electronics.
How tight can a printed fit be?
Precise fits are possible on FDM printers, but only if the design allows for how the process behaves. Some reference numbers:
- Hubs gives desktop FDM a typical accuracy of ±0.5% with a lower limit of ±0.5 mm for well-designed parts on well-calibrated machines, and puts material shrinkage at roughly 0.2–1%.
- Vertical holes usually print slightly undersized. For a critical diameter, Hubs suggests printing the hole small and drilling it to size.
- Large, flat parts can warp as they cool, which matters for long mating edges like the funnel halves above.
What this means for your design:
- Draw a deliberate gap between mating parts instead of modelling them at exactly the same size. PrototypeBD generally works with about 0.1 mm, and with 0.1 to 0.3 mm depending on the material and the printer's precision. Treat that as a starting point, not a guarantee for every geometry.
- When a fit is critical, print a small test coupon of just the joint or hole before printing the whole part.
- Mark which dimensions are critical when you send the file. That tells us where accuracy matters and where it doesn't.
- If the final part will be moulded, add draft now so the fit you approve is the fit you get.
Planning prototype rounds
A sensible sequence for most products has five steps:
- Form round. A quick print to agree on size, shape and proportions.
- Fit round. Check that the parts assemble with the real hardware.
- Function round. Test the assembled part under real use, in a material closer to the final one.
- Change the CAD and reprint. Note what failed, fix the model and print again.
- Lock the design, then tooling. Add draft if the part will be moulded, then commit to production.
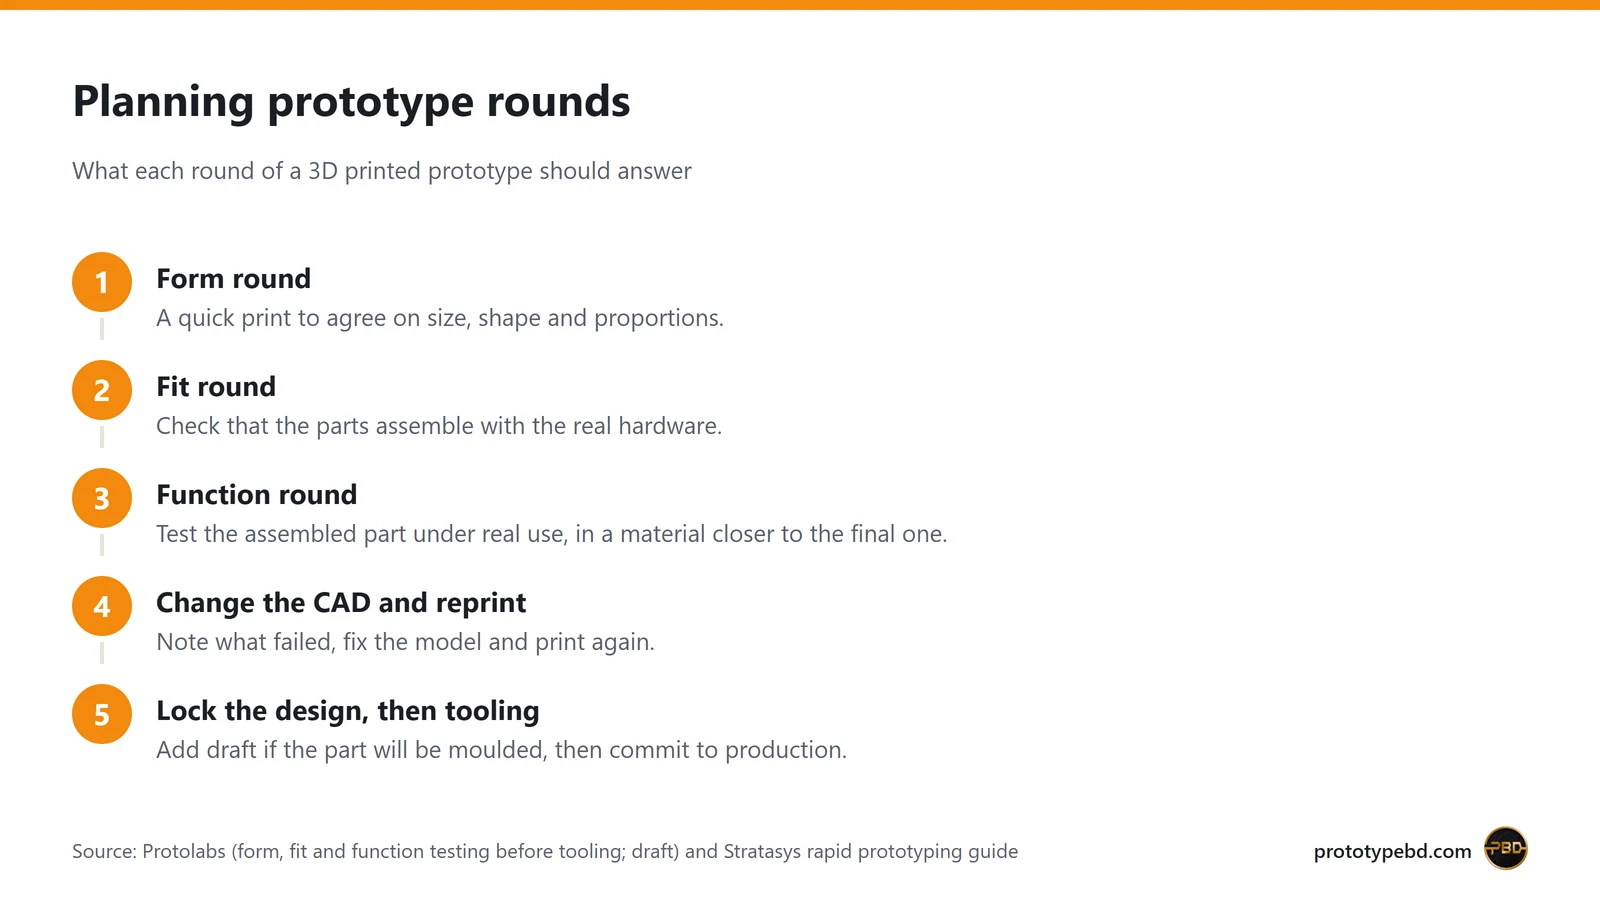
Stratasys makes the same distinction between low-fidelity prototypes early and higher-fidelity ones as development progresses.
Material choice follows the question. A form model can be printed in whatever prints cleanly. A function model may need PETG, ABS, ASA or nylon for heat or impact. Our filament guide compares the common options, and if your part needs very fine surface detail, compare FDM and SLA first.
How we print and fit prototypes at PrototypeBD
The facts in this section come from PrototypeBD itself, not from the posts above.
- Printers. Most prints run on high-end Bambu Lab printers such as the P1S, P2S and X2D. Parts too large for those go on a Creality Ender-5 Max, which Creality lists with a 400 × 400 × 400 mm build volume. The posts don't say which printer made which project, so we don't either.
- Clearance for press-fit and snap-fit parts. For halves that interlock, like the funnel above, or a lid that snaps onto a case, PrototypeBD generally leaves about 0.1 mm between mating faces, and 0.1 to 0.3 mm depending on the material and the printer. If a fit is critical, a small test piece of the joint is still the quickest check.
- Assembly and finishing on request. Assembly, painting and LED lighting can be added on request; we try our best to match what you need. They are not part of a standard print, so ask for them when you send the file.
Lead time and what decides the cost
Per the FDM quote page (October 2026), most jobs are finished within 2–5 working days of confirming the quote, and the quote shows the exact machine time for your part. The price is built from what the slicer measures on your actual file:
- Model weight: the filament inside the part, charged per gram at the rate of the material you choose.
- Support material: weighed and charged separately, so a part designed to print without supports costs less.
- Print time: the machine time for the job.
- Quality preset: the layer height and infill you choose scale the result.
For a prototype, two of those levers are in your hands. Design and orient the part to need fewer supports, and don't ask for fine layers or dense infill on a form model that only has to show shape. STEP and STP files are priced by our team by hand rather than instantly.
Getting a prototype made at PrototypeBD
- You have a 3D file. Upload it on the FDM 3D printing quote page. STL, 3MF and OBJ files get an automatic sliced price; STEP and STP files are accepted and priced by hand. The quote PDF comes to your WhatsApp.
- You have a sketch, photo or drawing. Use the CAD design service to turn it into a manufacturable 3D model first.
- You need fine detail. Use the SLA resin printing quote.
Parts are printed in our Dhaka workshop and delivered by courier across Bangladesh. Tell us what the prototype must prove, whether that is form, fit or function. That one sentence shapes how we orient, print and check the part.
Related articles
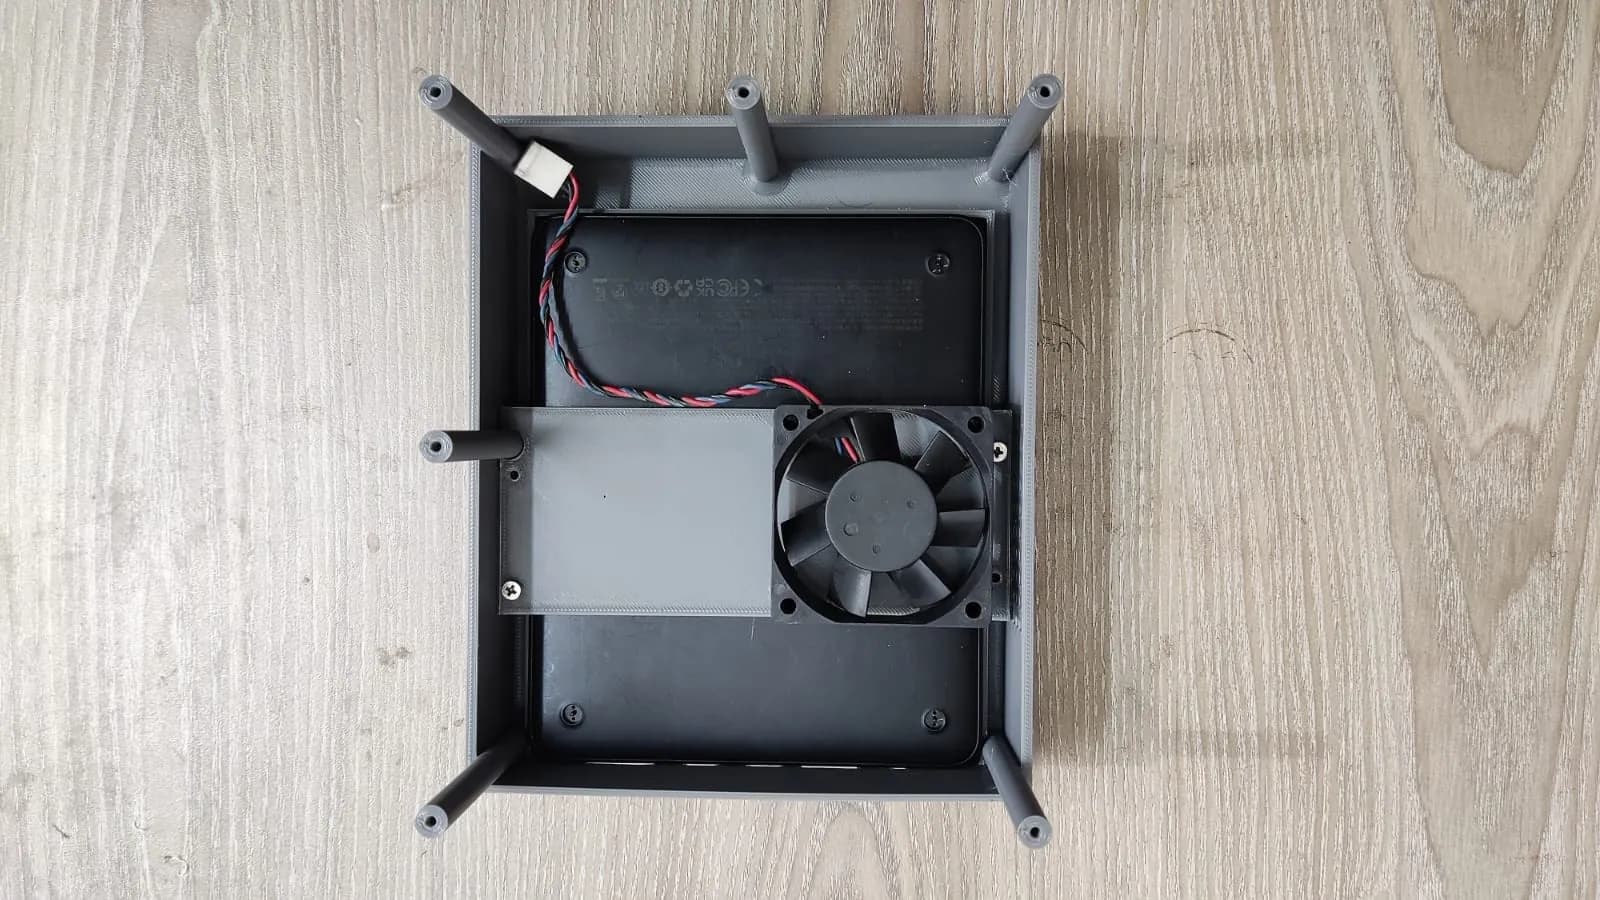
3D Printed Enclosures for Electronics in Bangladesh: Eight Projects and the Design Rules
Eight electronics enclosures PrototypeBD designed or printed, from an IoT gas meter to an MPPT charge controller, and the wall, boss, vent and material rules they show.
3D Printed Robot Parts in Bangladesh: Six Robotics Projects and a Display Model
What PrototypeBD's robotic arm, rover, self-balancing robot, drone and gear-model prints show about orientation, gears, shafts and filament choice for student robotics.
Architecture Thesis Models in Bangladesh: What 3D Printing Adds
Thesis and jury models PrototypeBD printed from 2023 to 2025: the scales students used, site vs building models, section and split models, and how to prepare your file.
Comments
Loading comments…